

How to Photograph Your Anime Doll for Social Sharing
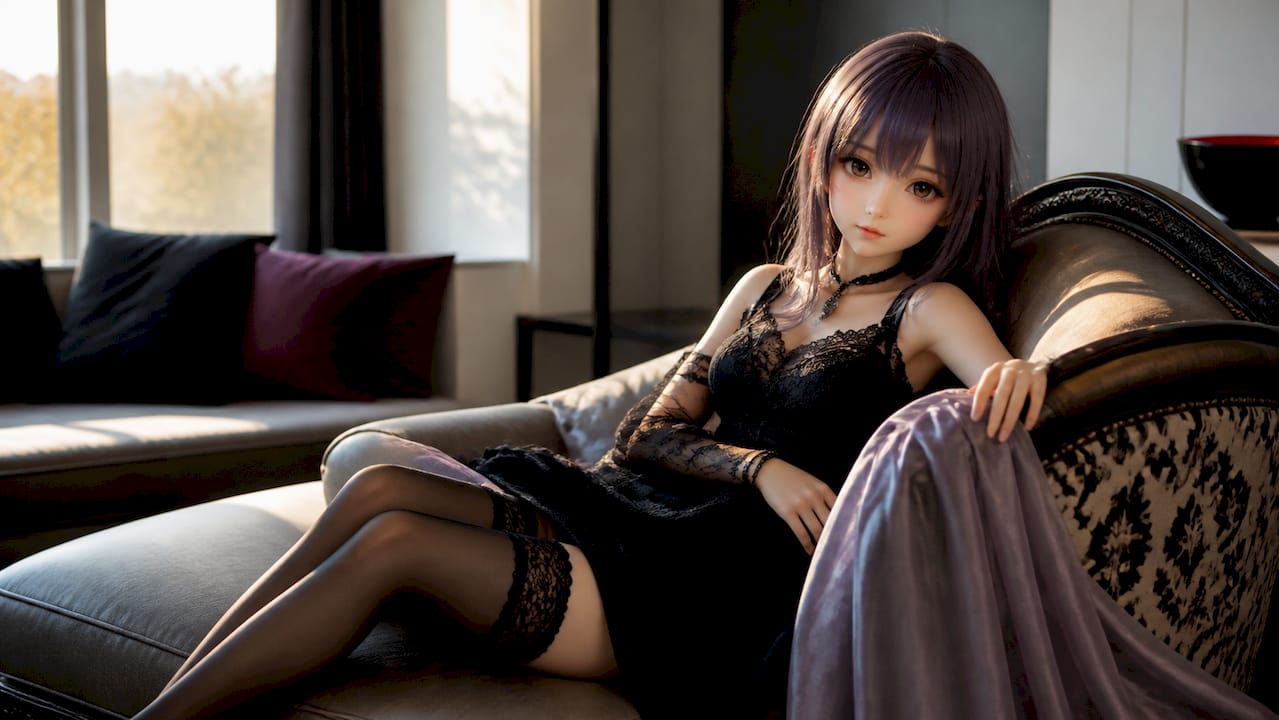
A scroll-stopping portrait of your life-size anime-style silicone or TPE doll is absolutely within reach using just your phone. The formula is simple: soft, diffused light + an eye-level portrait pose + a focal length commonly used in portrait photography + a light dusting of translucent powder to kill shine. Nail those four elements and you have a share-ready image before you touch an editing app.
Quick pre-shoot checklist:
- Light: Position near a large window, diffused with a sheer curtain or overcast sky
- Pose: Eye level, slight head tilt, one shoulder forward
- Camera: Phone set to 1x or 2x (never 0.5x ultra-wide), portrait mode on
- Finish: Dust exposed silicone or TPE skin with translucent powder to reduce shine
Key Takeaways
Soft, diffused window light combined with a focal length commonly used in portrait photography and intentional asymmetric posing produces the most share-ready anime doll portraits with no studio required.
| Point | Details |
|---|---|
| Light first, always | Diffuse window light at 45° with a white bounce card produces realistic skin rendering on silicone and TPE. |
| Avoid ultra-wide lenses | Shoot at 1x or 2x on your phone to preserve natural facial proportions; 0.5x distorts faces. |
| Kill shine before you shoot | Translucent powder on silicone/TPE skin eliminates specular highlights that ruin otherwise good images. |
| Export for the platform | Use 4:5 (1080 x 1350px, sRGB) for Instagram feed; label posts clearly to avoid automated content flags. |
| Youqdoll models reward technique | Youqdoll’s customizable face-ups, skin tones, and hair options make every lighting and posing choice visible in the final image. |
Table of Contents
- How to photograph your anime doll for social sharing: lighting that works
- What poses give your anime doll character and avoid mannequin stiffness?
- Which phone settings and gear actually make faces look right?
- How do you prep silicone and TPE skin, hair, and props for camera?
- How do you build a background that looks good on social feeds?
- What does a practical shoot-day workflow look like?
- How do you edit and export photos for Instagram, TikTok, and other platforms?
- What platform rules should you know before posting realistic doll images?
- Quick fixes for shiny skin, stiff poses, and lens distortion
- Why you can trust these recommendations
- The trade-offs worth knowing before your next shoot
- Your next Youqdoll shoot starts with the right model
- Sources
How to photograph your anime doll for social sharing: lighting that works
Soft, diffused light is the single biggest difference between a flat snapshot and an editorial portrait. Silicone and TPE respond to light much like human skin — specular highlights reveal texture beautifully under soft sources, but harsh direct light turns them into a plastic-looking, shiny mess.

A large north-facing window on an overcast day is your best free studio. Diffused natural light and portrait mode produce the most realistic render of silicone and TPE details on camera, and avoiding flash prevents the flattened, washed-out look that kills painted face-up detail. Place your doll at roughly 45° to the window so light wraps across the face, creating dimension. Add a white foam board or a folded white sheet on the shadow side to bounce light back and fill harsh shadows.
Catchlights matter. That small white reflection in the eye is what makes a portrait feel alive. Position your light source so it appears in the upper portion of the iris.
- DIY diffuser: Tape a single layer of white tissue paper or a sheer curtain over a sunny window. Harsh midday sun becomes usable soft light in seconds.
- LED panels: A bi-color LED panel (3200K–5600K range) gives you consistent, adjustable light when natural light isn’t available. Keep it at least 3 feet away and add a diffusion sock or softbox attachment.
- Ring lights: Convenient but produce flat, circular catchlights. Use them as fill, not as your key light.
- Direct flash: Avoid it. Professional model portrait techniques consistently identify soft, shaped light as the primary determinant of a successful portrait — direct flash undoes all of that.
Pro Tip: A budget DIY studio using key, fill, and rim light logic can replicate professional portrait results. A simple rim light (a small LED placed behind and to the side) separates your doll from the background and adds depth that reads beautifully on social feeds.
What poses give your anime doll character and avoid mannequin stiffness?
Symmetry is the enemy of a convincing portrait. When every limb is perfectly centered and every joint is locked straight, the image reads as a display mannequin, not a character. Small, intentional asymmetry is the fix.
Start at eye level or just slightly above. This angle creates intimacy and feels natural to a viewer scrolling a feed. A slight downward angle from above can work for stylized, anime-inspired looks, but go too high and you lose the sense of scale that makes a life-size doll impressive.
- Head tilt: 5–10 degrees to one side. Small, not dramatic.
- Shoulder angle: Rotate one shoulder slightly toward the camera. This creates a three-quarter body angle that reads as relaxed.
- Hand placement: Bend the wrist slightly, rest fingers on a surface, or bring one hand near the face. Flat, straight hands at the sides look stiff.
- Weight shift: If your doll’s stand allows it, shift the hip slightly to one side. Even a subtle lean changes the silhouette.
For composition, place the eyes on the upper third of the frame rather than dead center. Negative space on one side of the frame gives the image breathing room and works especially well for Instagram’s 4:5 crop. Leading lines — a windowsill edge, a fabric fold — can draw the eye toward the face.
Pro Tip: Bring one prop into the frame at middleground distance. A cup, a book, or a piece of fabric between the camera and the doll adds a layer of depth that sells the scene as a real environment, not a posed setup. Check out why anime fans choose themed dolls for character-building ideas that translate directly into storytelling poses.
Which phone settings and gear actually make faces look right?
That range is what portrait photographers have used for decades because it renders faces without compression or distortion.
- Portrait mode: Turn it on. It softens the background and sharpens the face, which is exactly what you want.
- Tap to focus: Tap the face on your screen, then hold to lock focus and exposure. This prevents the camera from hunting focus mid-shot.
- Stabilization: Use a small tabletop tripod and a Bluetooth remote shutter. Camera shake at close distances creates soft, unusable images.
- Low-light settings: Raise ISO only after you’ve maximized available light. ISO 400–800 is manageable on most modern phones; above that, noise becomes visible in smooth skin areas.
Practical phone tips — clean lens, locked focus, tripod, and reflectors — are the fastest way to eliminate the most common capture problems. Wipe your lens before every session. Fingerprint smear is invisible to the eye but shows up as haze in photos.
Pro Tip: If you want to step up to a dedicated camera later, a mirrorless body with a 35mm or 50mm prime lens follows the exact same lighting and posing principles. The phone-first workflow scales directly — you’re learning technique, not just phone tricks.
How do you prep silicone and TPE skin, hair, and props for camera?
Silicone and TPE both pick up shine from handling, oils, and ambient humidity. A light dusting of translucent setting powder (the kind used in makeup, silicone-safe formulas preferred) diffuses specular highlights and gives skin a matte, realistic finish on camera. Apply with a large, soft brush and dust off any excess.
- Seam concealment: Use a small amount of silicone-safe body paint or concealer along visible seams. Check in your shoot lighting before committing to a full session.
- Hair and wigs: Detangle before the shoot, smooth flyaways with a light-hold spray, and check that the wig sits flush at the hairline. Anime hair choices significantly affect photographic character — a well-styled wig reads as intentional; a messy one reads as neglected.
- Wardrobe: Scale-appropriate clothing matters. Oversized garments create unnatural folds that distract from the face. Small binder clips at the back can tighten a loose fit without altering the garment.
- Props: One or two, maximum. A prop that connects to the character’s story adds context; three or more props compete with the face for attention.
- Last-minute checklist: Check for dust on skin, lint on clothing, and stray hairs across the face before pressing the shutter.
How do you build a background that looks good on social feeds?
A clean, neutral backdrop (white, gray, or a muted fabric) keeps the focus on your doll. But a sliver of real environment — a windowsill, a bookshelf edge, a plant — makes an image feel editorial rather than catalog-style. The difference between a product shot and a portrait is context.
- Backdrop options: Seamless paper rolls, hung fabric, or a textured wall all work. Avoid busy patterns that compete with the subject.
- Depth layering: Place a prop in the foreground, your doll in the middle, and a soft background behind. Three distinct planes of depth make a flat phone image feel three-dimensional.
- Color theory: Complementary colors (a warm-toned doll against a cool blue-gray background) create visual contrast that pops on a feed. Analogous palettes (warm skin against warm wood tones) feel intimate and soft.
Pro Tip: Hide doll stands in-camera by positioning them behind a prop or at the edge of the frame. In post, a quick spot-heal in Snapseed removes any remaining stand hardware in under 30 seconds.
What does a practical shoot-day workflow look like?
A simple portrait session with one lighting setup and two or three outfits takes roughly 60–90 minutes from setup to final review. An editorial set with multiple backgrounds and poses can run 3–4 hours. Plan accordingly.
Pre-shoot:
- Clean lens, charge phone/camera battery, format memory card
- Dust skin with powder, style hair, pre-position backdrop and props
- Set light source and check catchlights in the eyes
During the shoot:
- Set light first, then position the doll, then lock camera settings
- Bracket exposures (shoot one stop over and one stop under your base exposure)
- Review on a larger screen if possible before moving to the next setup
After the shoot:
- Back up all files immediately to a second location (cloud or external drive)
- Name files by date and setup for easy retrieval
How do you edit and export photos for Instagram, TikTok, and other platforms?
Light editing preserves the hand-painted face-up detail that makes your doll unique. Heavy filters and aggressive skin smoothing erase the very details that make the image worth sharing.
- Mobile apps: Lightroom Mobile and Snapseed are the two most reliable options. Prioritize exposure, white balance, and clarity adjustments over presets.
- Retouching: Reduce shine with the healing brush, sharpen the eyes with a selective sharpness mask, and leave skin texture alone.
- Aspect ratios: 4:5 for Instagram feed posts (1080 x 1350px), 1:1 for square grid layouts, and 9:16 vertical for Reels and Stories.
- Export settings: sRGB color space, 1080–1350px on the long edge for Instagram feed. Compress to under 1MB for Stories to avoid platform recompression artifacts.
Pro Tip: Save two versions of every hero image: one lightly edited native crop for close-up detail posts, and one slightly wider crop for carousel slides. Carousels consistently drive higher saves and shares than single images on Instagram.
What platform rules should you know before posting realistic doll images?
Realistic adult-themed images, including life-size dolls, can trigger automated content moderation on Instagram, TikTok, Reddit, and Twitter/X. The platforms’ systems are trained on human images and may flag realistic silicone or TPE figures, especially in suggestive poses or minimal clothing.
- Label clearly: Include a caption or hashtag (e.g., #dollphotography, #siliconedoll) that signals the subject is a doll, not a person. This helps both algorithms and human reviewers.
- Avoid location metadata: Strip GPS data from images before posting. Most phones embed location data by default; disable this in your camera settings.
- Non-identifying backgrounds: Avoid backgrounds that include real addresses, license plates, or identifiable landmarks.
- Consent analogs: If your doll’s face-up resembles a real person, add a clear disclaimer in the caption. Ethical community practice means being transparent about the subject.
- Archive originals: Keep original files and captions so you can respond quickly if a platform questions a post.
Pro Tip: Check your image at reduced resolution (zoom out on your phone screen) before posting. Moderation systems often work on compressed thumbnails, and a thumbnail that looks ambiguous is more likely to be flagged than one that clearly reads as a doll.
Quick fixes for shiny skin, stiff poses, and lens distortion
Most shoot problems have a one-step fix. Run through this list before deleting any image.
- Shiny skin: Dust with translucent powder, change your angle relative to the light source, or reduce highlights in Lightroom Mobile’s selective adjustment tool.
- Stiff pose: Remove symmetry. Move one hand, tilt the head 5 degrees, shift one shoulder forward.
- Lens distortion: You’re using the ultra-wide lens. Switch to 1x or 2x and move back, then crop in post.
- Soft focus: Use a tripod, increase shutter speed, or use burst mode and select the sharpest frame.
- Flat image: Add a rim light or move the doll closer to the window to increase light-to-shadow contrast.
Why you can trust these recommendations
The techniques in this guide draw from professional model-portrait principles, doll-photography community standards, and Youqdoll’s direct product expertise in silicone and TPE customization.
Youqdoll’s guides on anime feature customization and the artistry behind anime doll design provide the product-specific context behind the styling recommendations here. The photography techniques are grounded in professional portrait sources and doll-community guides, all linked in the sources section below.
The trade-offs worth knowing before your next shoot
The biggest mistake new doll photographers make is buying more gear before mastering light. A ring light, a backdrop stand, and a camera body won’t fix a poorly placed subject in flat, uncontrolled light. The phone-first approach isn’t a compromise — it’s the fastest path to understanding what actually makes a portrait work.
For casual social posts, a window and your phone are genuinely enough. For editorial-quality images, the upgrade that pays off most is a simple two-light setup (key plus rim), not a more expensive camera. Invest in technique first, then gear.
One more thing worth saying plainly: doll photography communities are welcoming, creative, and serious about their craft. Label your posts clearly, engage respectfully, and contribute positively. The community grows when members share knowledge, not just images.
Your next Youqdoll shoot starts with the right model
Getting the shot right is easier when your doll is built for it. Youqdoll’s anime-style doll collection is crafted with photography in mind — detailed face-ups, customizable skin tones, and hair options that hold their style under studio lighting. Models like Scarlett (166cm silicone) and Tiffany (166cm silicone) offer the kind of detail that rewards the techniques in this guide: layered skin texture, expressive features, and wardrobe flexibility that makes every session different.

Browse the full collection, choose your customization options, and you’ll have a model that makes every lighting setup worth the effort. Visit Youqdoll to find your perfect match.
Sources
These are the primary sources behind the techniques in this guide, plus a few practical resources for readers who want to go deeper.
- # You Can Shoot Professional Model Portraits With a Phone. Here’s How.
- How To Pose & Display Full Body Silicone Reborn Dolls 2026
- BJD Photography — The Best 6 Tips for Stunning Doll Photos | SoulBJD
- How to Photograph Your Dolls for Social Media: A Complete – niannyyhouse
Before posting highly realistic images, review the platform policies section of this guide and check the current community guidelines for the specific platform you use.