

How Doll Realism Is Achieved: Craft and Science
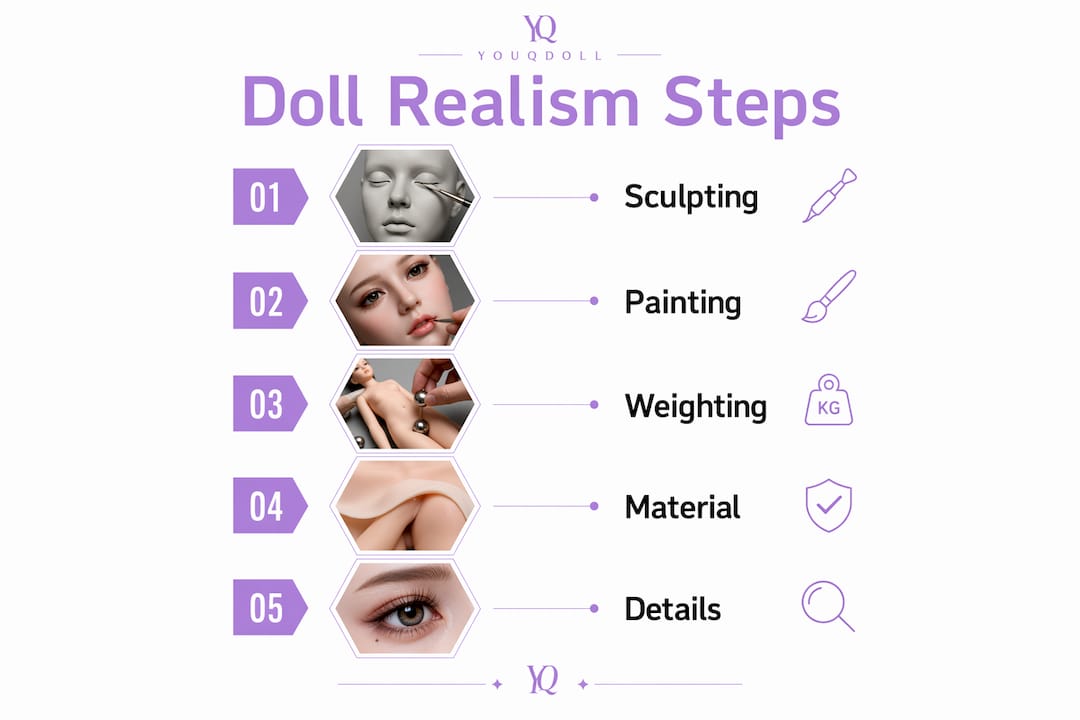
Doll realism is achieved through four interlocking disciplines: sculpting accuracy, multi-layered painting, strategic weighting, and material science. Together, these methods replicate the look, feel, and weight of a real human infant. Sculpting, painting, and weighting form the foundation of every lifelike doll, while material choice determines how all those elements interact. Whether you are a collector, an artist, or simply fascinated by the craft, understanding how doll realism is achieved reveals a discipline that sits at the intersection of fine art and materials engineering.
How doll realism is achieved through sculpting accuracy
The sculpt is the skeleton of every realistic doll. Without anatomically correct proportions, no amount of paint or weighting will produce a convincing result. Artists work from 1:1 human infant anatomy, measuring head circumference, limb length, and torso depth against real newborn data.
Realistic dolls avoid exaggerated expressions and symmetrical perfection. Real faces are slightly uneven. A doll that looks too perfect reads as artificial immediately. Skilled sculptors deliberately introduce asymmetry: one eyelid slightly heavier, a lip corner that turns just a fraction more than the other.

The micro details separate good sculpts from great ones. Pores, fine skin creases at the wrists and ankles, and the subtle fold of a newborn’s earlobe all require individual attention. These are not decorative flourishes. They are the details your eye processes unconsciously when it decides whether something looks real.
Advanced multi-part molds preserve every line of the original sculpt. A single-piece mold compresses detail during casting. Multi-part molds allow the silicone or vinyl to flow into every crevice without distortion, so the finished piece matches the artist’s original intent.
- 1:1 proportions: Measure against real infant anatomy, not idealized cartoon ratios.
- Deliberate asymmetry: Introduce subtle unevenness in facial features to avoid the “uncanny valley” effect.
- Micro detail capture: Sculpt pores, skin folds, and vein paths directly into the original clay.
- Multi-part molds: Use segmented casting to preserve fine surface detail during production.
- Restrained expressions: Neutral or softly sleeping expressions read as more realistic than dramatic ones.
Pro Tip: Photograph your sculpt under raking light (a single light source at a low angle) before casting. This reveals surface inconsistencies invisible under standard lighting and saves you from discovering flaws after the mold is made.
What painting techniques create lifelike skin tones?
Painting is where a technically accurate sculpt becomes a living face. The process uses dozens of thin, translucent layers rather than a single opaque coat. Each layer adds depth, the same way real skin has multiple layers of tissue, each contributing to its overall color and glow.
Beginner mistakes include heavy detail; professionals prioritize restrained, multi-layer effects. A single thick coat of flesh-toned paint produces a flat, chalky result. Translucent layering, by contrast, lets light pass through each coat and reflect back differently, mimicking how light interacts with actual skin.
The sequence of layers follows a specific logic:
- Base wash: Apply a very diluted flesh tone across the entire surface to establish the undertone. This coat should be nearly invisible on its own.
- Mottling: Add irregular patches of pink, purple, and red to simulate the uneven blood flow visible in newborn skin.
- Vein mapping: Paint fine blue and green lines along the temples, scalp, and inner wrists. Use a liner brush and keep lines thin and irregular.
- Blushing: Build warmth on the cheeks, nose tip, knuckles, and heels. These are the areas where blood sits closest to the surface.
- Capillary detail: Add tiny broken red lines to the nose and eyelids for the fine capillary network visible in real skin.
- Sealing and curing: Heat-set or air-cure each layer before adding the next. Skipping this step causes layers to lift or blend unintentionally.
- Final finish: Apply a matte varnish to the skin and a controlled gloss to the lips and inner corners of the eyes.
Matte skin with slight gloss on lips and eyes adds life and prevents plastic shine. The contrast between surfaces is what your brain uses to distinguish skin from mucous membrane. Getting that contrast right is one of the most powerful finishing moves in realistic doll crafting.
Pro Tip: Mix your paints in natural daylight, not under artificial studio lighting. Artificial light shifts color temperature and causes colors that look correct in the studio to appear orange or gray in normal indoor settings.
Why does weighting matter for tactile realism?
Visual realism only carries a doll so far. The moment someone picks it up, the weight and movement of the piece either confirms or destroys the illusion. Glass beads, poly pellets, and fiberfill are the three primary weighting materials, and each serves a different function.
Glass beads provide dense, concentrated weight and are placed in the lowest parts of the body: the bottom, the feet, and the lower back. This replicates the natural center of gravity in a real infant, where the heaviest mass sits low. Poly pellets offer a softer, more distributed weight and work well in the torso and upper limbs. Fiberfill fills the remaining space, providing the soft give you feel when you press against a real baby’s arm or cheek.
Weighting must consider head support and balance to replicate infant limpness authentically. A poorly weighted head that sits too stiff or too heavy feels wrong immediately. The head should loll slightly when unsupported, just as a newborn’s does before neck muscles develop.
- Glass beads: Dense and concentrated; place in lower body zones to anchor the center of gravity.
- Poly pellets: Softer and more distributed; ideal for torso and upper limbs.
- Fiberfill: Provides soft give and fills remaining space; prevents hollow spots.
- Head weighting: Balance head weight carefully so it moves naturally without flopping uncontrollably.
- Cloth bodies: Fabric bodies allow posability and softness that rigid internal frames cannot match for tactile comfort.
The emotional payoff of correct weighting is significant. Collectors and enthusiasts consistently report that the sensory experience of weight and texture produces the strongest emotional response, stronger even than visual detail alone.
Silicone vs. vinyl: how material choice shapes realism
Material selection is not an aesthetic decision. It is a technical one that determines how every other step performs. Silicone and vinyl each have distinct surface properties that affect paint adhesion, hair rooting, and final texture.
Material science is as critical as artistic skill for an authentic result. Silicone absorbs pigment differently than vinyl does. Artists who switch between materials without adjusting their paint formulas often find their colors shift, bleed, or fail to cure correctly.
| Property | Silicone | Vinyl |
|---|---|---|
| Texture | Soft, skin-like, flexible | Firmer, slightly rigid |
| Paint adhesion | Requires silicone-specific pigments | Accepts standard air-dry paints |
| Hair rooting | Accepts rooting needles but requires care | Roots easily with standard needles |
| Durability | Highly resistant to tearing | Prone to cracking over time |
| Detail capture | Captures fine surface detail precisely | Good detail, slightly less crisp |
| Cost | Higher production cost | More affordable |
Silicone’s flexibility gives it a skin-like quality that vinyl cannot fully replicate. When you press a silicone torso with your finger, the material gives and recovers the way real tissue does. Vinyl is firmer and works well for collectors who prioritize durability and paint stability over tactile softness.
The trade-off artists face is between finish quality and longevity. Silicone produces a more convincing sensory result but demands specialized paints and more careful handling. Vinyl is forgiving for beginners and holds paint reliably over years of display. Youqdoll uses both materials across its product range, pairing silicone heads with TPE bodies to balance realism and durability in a single piece.
What fine details push a doll from good to convincing?
The final layer of realism comes from details so small they register below conscious awareness. Micro-rooted hair is the most labor-intensive of these. Micro-rooting involves inserting strands one or two at a time, following natural growth patterns, and can take up to 40 hours per head. The result is hair that parts, lies flat, and moves the way a real scalp does.
Eyebrows and eyelashes receive similar treatment. Painted brows use the same multi-layer approach as skin, building from light to dark with individual hair strokes rather than a single filled shape. Inserted lashes use fine mohair or human hair, rooted at the lash line one cluster at a time.
- Micro-rooted hair: Insert strands individually following the natural growth direction of the scalp.
- Painted brows: Build with fine individual strokes from light base to dark tip, not a single filled shape.
- Inserted lashes: Root fine mohair or human hair at the lash line for natural movement.
- Nail detailing: Paint nails with a translucent pink base, then add a thin white free edge and a subtle gloss coat.
- Skin imperfections: Add milk spots, faint scratches, or a small birthmark to break up perfect skin and add authenticity.
The principle behind all of these details is restraint. Over-sculpting and over-painting reduce realism. The same applies to fine details. One well-placed milk spot reads as real. Ten milk spots read as decoration. The goal is always to suggest reality, not to catalog every possible feature.
Key takeaways
Doll realism requires sculpting accuracy, layered painting, correct weighting, and the right material to produce a result that convinces both the eye and the hand.
| Point | Details |
|---|---|
| Sculpting is the foundation | Anatomically correct proportions and deliberate asymmetry prevent the uncanny valley effect. |
| Layered painting builds depth | Dozens of translucent coats mimic the complexity of real skin far better than any single opaque layer. |
| Weight distribution creates tactile realism | Glass beads, poly pellets, and fiberfill placed strategically replicate infant center of gravity and limpness. |
| Material choice affects every other step | Silicone and vinyl absorb paint differently, demanding adjusted techniques and pigment formulas. |
| Fine details work through restraint | Micro-rooted hair and subtle imperfections add authenticity only when used sparingly and purposefully. |
The craft demands more patience than talent
I have spent years studying what separates a doll that stops people in their tracks from one that just looks like a well-made toy. The answer is almost never a single technique. It is the accumulation of small, patient decisions made correctly across every stage.
The part most people underestimate is the relationship between material chemistry and paint behavior. You can have perfect color-mixing instincts and still produce a flat result if your pigment formula does not match your substrate. Mastery of skin tone depth and anatomy requires years of practice, and a significant portion of that time is spent learning why a technique that works on vinyl fails on silicone.
The other thing I have noticed is that the artists who produce the most convincing work are the ones who study real infants, not other dolls. Copying existing reborn work teaches you conventions. Studying real skin teaches you truth. The difference shows up in every layer.
Restraint is the hardest skill to develop. Every beginner wants to add more detail, more color, more texture. The professionals I respect most know exactly when to stop. A doll that reads as real is one where the viewer’s brain fills in the gaps. Your job is to give it just enough information to do that work on its own.
— Alfie
Youqdoll’s approach to lifelike craftsmanship
Youqdoll builds every piece around the same principles covered here: precise sculpting, quality materials, and attention to the details that create genuine sensory realism.

The Yoyo 163cm silicone doll demonstrates what advanced silicone construction delivers at full scale: soft, flexible skin texture, accurate proportions, and a weight distribution that feels natural in hand. Youqdoll offers full customization across skin tone, facial features, body type, and hair color, so your piece reflects exactly what you want. Every order ships discreetly, backed by a 100% satisfaction guarantee. If you are ready to see what premium craftsmanship looks like up close, the Amelia 165cm silicone doll is a strong place to start.
FAQ
What is the most important factor in doll realism?
Sculpting accuracy is the foundation, but realistic doll crafting methods require all four elements: accurate sculpting, layered painting, correct weighting, and the right material. No single factor compensates for a weakness in another.
How many paint layers does a realistic doll require?
Creating realistic dolls typically involves dozens of thin, translucent layers. Each layer adds depth and color variation that a single opaque coat cannot replicate.
Why does doll weight matter so much?
Weight distribution replicates the natural center of gravity and limpness of a real infant. Poorly weighted dolls feel unnatural immediately, breaking the tactile illusion regardless of how accurate the visual detail is.
What is micro-rooting and how long does it take?
Micro-rooting is the process of inserting hair strands one or two at a time to follow natural scalp growth patterns. It can take up to 40 hours per head and produces results virtually indistinguishable from a real scalp.
Is silicone or vinyl better for lifelike dolls?
Silicone produces a softer, more skin-like texture and captures fine surface detail more precisely. Vinyl offers better paint stability and durability over time. The best choice depends on whether you prioritize tactile realism or long-term display quality.